


浏览 998
Nginx是一款轻量级的Web 服务器/反向代理服务器及电子邮件(IMAP/POP3)代理服务器,并在一个BSD-like 协议下发行。其特点是占有内存少,并发能力强,事实上nginx的并发能力确实在同类型的网页服务器中表现较好,中国大陆使用nginx网站用户有:百度、京东、新浪、网易、腾讯、淘宝等。
为什么要用Nginx?
目前 Nginx 的主力竞争对手莫过于 Apache ,在这里小编对两者做一个简单的对比,帮助大家更好的理解 Nginx 的优势。
1、作为 Web 服务器:
相比 Apache,Nginx 使用更少的资源,支持更多的并发连接,体现更高的效率,这点使 Nginx 尤其受到虚拟主机提供商的欢迎。在高连接并发的情况下,Nginx是Apache服务器不错的替代品: Nginx在美国是做虚拟主机生意的老板们经常选择的软件平台之一,能够支持高达 50000 个并发连接数的响应, 感谢Nginx 为我们选择了 epoll and kqueue 作为开发模型。
Nginx作为负载均衡服务器: Nginx 既可以在内部直接支持 Rails 和 PHP 程序对外进行服务, 也可以支持作为 HTTP代理 服务器对外进行服务。Nginx采用C进行编写, 不论是系统资源开销还是CPU使用效率都比 Perlbal 要好很多。
2、Nginx 配置简洁, Apache 复杂:
Nginx 启动特别容易, 并且几乎可以做到7*24不间断运行,即使运行数个月也不需要重新启动. 你还能够不间断服务的情况下进行软件版本的升级。
Nginx 静态处理性能比 Apache 高 3倍以上,Apache 对 PHP 支持比较简单,Nginx 需要配合其他后端来使用 ,Apache 的组件比 Nginx 多。
3、最核心的区别在于:
apache是同步多进程模型,一个连接对应一个进程;nginx是异步的,多个连接(万级别)可以对应一个进程 。
4、两者的擅长领域分别是:
nginx的优势是处理静态请求,cpu内存使用率低,apache适合处理动态请求,所以现在一般前端用nginx作为反向代理抗住压力,apache作为后端处理动态请求。
Nginx 基本使用方法
系统平台:CentOS release 6.6 (Final) 64位。
一、安装编译工具及库文件
yum -y install make zlib zlib-devel gcc-c++ libtool openssl openssl-devel二、首先要安装 PCRE
1、PCRE 作用是让 Nginx 支持 Rewrite 功能。下载 PCRE 安装包,下载地址: http://downloads.sourceforge.net/project/pcre/pcre/8.35/pcre-8.35.tar.gz
[root@bogon src]# wget http://downloads.sourceforge.net/project/pcre/pcre/8.35/pcre-8.35.tar.gz
2、解压安装包:
[root@bogon src]# tar zxvf pcre-8.35.tar.gz3、进入安装包目录
[root@bogon src]# cd pcre-8.354、编译安装
[root@bogon pcre-8.35]# ./configure
[root@bogon pcre-8.35]# make && make install
5、查看pcre版本
[root@bogon pcre-8.35]# pcre-config --version
三、安装 Nginx
1、下载 http://nginx.org/download/nginx-1.6.2.tar.gz
[root@bogon src]# wget http://nginx.org/download/nginx-1.6.2.tar.gz
2、解压安装包
[root@bogon src]# tar zxvf nginx-1.6.2.tar.gz3、进入安装包目录
[root@bogon src]# cd nginx-1.6.24、编译安装
[root@bogon nginx-1.6.2]# ./configure --prefix=/usr/local/webserver/nginx --with-http_stub_status_module --with-http_ssl_module --with-pcre=/usr/local/src/pcre-8.35
[root@bogon nginx-1.6.2]# make
[root@bogon nginx-1.6.2]# make install
5、查看nginx版本
[root@bogon nginx-1.6.2]# /usr/local/webserver/nginx/sbin/nginx -v
到此,nginx安装完成。
四、Nginx 配置
创建 Nginx 运行使用的用户 www:
[root@bogon conf]# /usr/sbin/groupadd www
[root@bogon conf]# /usr/sbin/useradd -g www www
配置nginx.conf ,将/usr/local/webserver/nginx/conf/nginx.conf替换为以下内容
[root@bogon conf]#  cat /usr/local/webserver/nginx/conf/nginx.conf

user www www;
worker_processes 2; #设置值和CPU核心数一致
error_log /usr/local/webserver/nginx/logs/nginx_error.log crit; #日志位置和日志级别
pid /usr/local/webserver/nginx/nginx.pid;
#Specifies the value for maximum file descriptors that can be opened by this process.
worker_rlimit_nofile 65535;
events
{
  use epoll;
  worker_connections 65535;
}
http
{
  include mime.types;
  default_type application/octet-stream;
  log_format main  '$remote_addr - $remote_user [$time_local] "$request" '
               '$status $body_bytes_sent "$http_referer" '
               '"$http_user_agent" $http_x_forwarded_for';

#charset gb2312;

  server_names_hash_bucket_size 128;
  client_header_buffer_size 32k;
  large_client_header_buffers 4 32k;
  client_max_body_size 8m;

  sendfile on;
  tcp_nopush on;
  keepalive_timeout 60;
  tcp_nodelay on;
  fastcgi_connect_timeout 300;
  fastcgi_send_timeout 300;
  fastcgi_read_timeout 300;
  fastcgi_buffer_size 64k;
  fastcgi_buffers 4 64k;
  fastcgi_busy_buffers_size 128k;
  fastcgi_temp_file_write_size 128k;
  gzip on;
  gzip_min_length 1k;
  gzip_buffers 4 16k;
  gzip_http_version 1.0;
  gzip_comp_level 2;
  gzip_types text/plain application/x-javascript text/css application/xml;
  gzip_vary on;

  #limit_zone crawler $binary_remote_addr 10m;
 #下面是server虚拟主机的配置
 server
  {
    listen 80;#监听端口
    server_name localhost;#域名
    index index.html index.htm index.php;
    root /usr/local/webserver/nginx/html;#站点目录
      location ~ .*\.(php|php5)?$
    {
      #fastcgi_pass unix:/tmp/php-cgi.sock;
      fastcgi_pass 127.0.0.1:9000;
      fastcgi_index index.php;
      include fastcgi.conf;
    }
    location ~ .*\.(gif|jpg|jpeg|png|bmp|swf|ico)$
    {
      expires 30d;
  # access_log off;
    }
    location ~ .*\.(js|css)?$
    {
      expires 15d;
   # access_log off;
    }
    access_log off;
  }

}
检查配置文件ngnix.conf的正确性命令:
[root@bogon conf]# /usr/local/webserver/nginx/sbin/nginx -t
五、启动 Nginx
Nginx 启动命令如下:
[root@bogon conf]# /usr/local/webserver/nginx/sbin/nginx
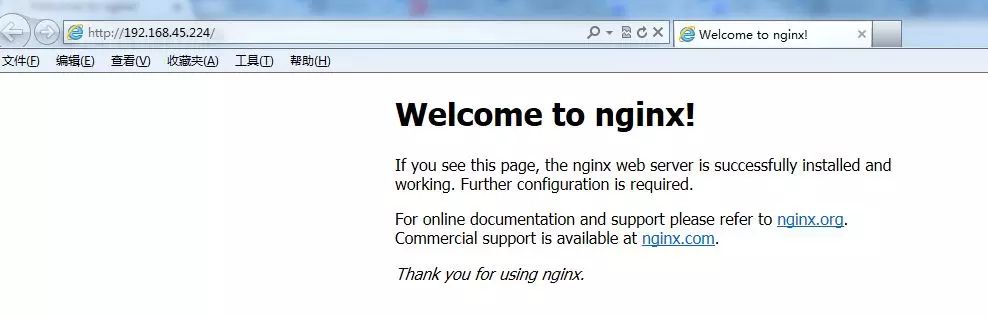
六、访问站点
从浏览器访问我们配置的站点ip:
Nginx 常用指令说明
1. main 全局配置
nginx在运行时与具体业务功能(比如http服务或者email服务代理)无关的一些参数,比如工作进程数,运行的身份等。
- woker_processes 2
在配置文件的顶级main部分,worker角色的工作进程的个数,master进程是接收并分配请求给worker处理。这个数值简单一点可以设置为cpu的核数grep ^processor /proc/cpuinfo | wc -l,也是 auto 值,如果开启了ssl和gzip更应该设置成与逻辑CPU数量一样甚至为2倍,可以减少I/O操作。如果nginx服务器还有其它服务,可以考虑适当减少。 - worker_cpu_affinity
也是写在main部分。在高并发情况下,通过设置cpu粘性来降低由于多CPU核切换造成的寄存器等现场重建带来的性能损耗。如worker_cpu_affinity 0001 0010 0100 1000; (四核)。 - worker_connections 2048
写在events部分。每一个worker进程能并发处理(发起)的最大连接数(包含与客户端或后端被代理服务器间等所有连接数)。nginx作为反向代理服务器,计算公式 最大连接数 = worker_processes * worker_connections/4,所以这里客户端最大连接数是1024,这个可以增到到8192都没关系,看情况而定,但不能超过后面的worker_rlimit_nofile。当nginx作为http服务器时,计算公式里面是除以2。 - worker_rlimit_nofile 10240
写在main部分。默认是没有设置,可以限制为操作系统最大的限制65535。 - use epoll
写在events部分。在Linux操作系统下,nginx默认使用epoll事件模型,得益于此,nginx在Linux操作系统下效率相当高。同时Nginx在OpenBSD或FreeBSD操作系统上采用类似于epoll的高效事件模型kqueue。在操作系统不支持这些高效模型时才使用select。
2. http服务器
与提供http服务相关的一些配置参数。例如:是否使用keepalive啊,是否使用gzip进行压缩等。
- sendfile on
开启高效文件传输模式,sendfile指令指定nginx是否调用sendfile函数来输出文件,减少用户空间到内核空间的上下文切换。对于普通应用设为 on,如果用来进行下载等应用磁盘IO重负载应用,可设置为off,以平衡磁盘与网络I/O处理速度,降低系统的负载。 - keepalive_timeout 65 : 长连接超时时间,单位是秒,这个参数很敏感,涉及浏览器的种类、后端服务器的超时设置、操作系统的设置,可以另外起一片文章了。长连接请求大量小文件的时候,可以减少重建连接的开销,但假如有大文件上传,65s内没上传完成会导致失败。如果设置时间过长,用户又多,长时间保持连接会占用大量资源。
- send_timeout : 用于指定响应客户端的超时时间。这个超时仅限于两个连接活动之间的时间,如果超过这个时间,客户端没有任何活动,Nginx将会关闭连接。
- client_max_body_size 10m
允许客户端请求的最大单文件字节数。如果有上传较大文件,请设置它的限制值 - client_body_buffer_size 128k
缓冲区代理缓冲用户端请求的最大字节数
模块http_proxy:
这个模块实现的是nginx作为反向代理服务器的功能,包括缓存功能(另见文章)
- proxy_connect_timeout 60
nginx跟后端服务器连接超时时间(代理连接超时) - proxy_read_timeout 60
连接成功后,与后端服务器两个成功的响应操作之间超时时间(代理接收超时) - proxy_buffer_size 4k
设置代理服务器(nginx)从后端realserver读取并保存用户头信息的缓冲区大小,默认与proxy_buffers大小相同,其实可以将这个指令值设的小一点 - proxy_buffers 4 32k
proxy_buffers缓冲区,nginx针对单个连接缓存来自后端realserver的响应,网页平均在32k以下的话,这样设置 - proxy_busy_buffers_size 64k
高负荷下缓冲大小(proxy_buffers*2) - proxy_max_temp_file_size
当proxy_buffers放不下后端服务器的响应内容时,会将一部分保存到硬盘的临时文件中,这个值用来设置最大临时文件大小,默认1024M,它与proxy_cache没有关系。大于这个值,将从upstream服务器传回。设置为0禁用。 - proxy_temp_file_write_size 64k
当缓存被代理的服务器响应到临时文件时,这个选项限制每次写临时文件的大小。proxy_temp_path(可以在编译的时候)指定写到哪那个目录。
proxy_pass,proxy_redirect见 location 部分。
模块http_gzip:
- gzip on : 开启gzip压缩输出,减少网络传输。
- gzip_min_length 1k : 设置允许压缩的页面最小字节数,页面字节数从header头得content-length中进行获取。默认值是20。建议设置成大于1k的字节数,小于1k可能会越压越大。
- gzip_buffers 4 16k : 设置系统获取几个单位的缓存用于存储gzip的压缩结果数据流。4 16k代表以16k为单位,安装原始数据大小以16k为单位的4倍申请内存。
- gzip_http_version 1.0 : 用于识别 http 协议的版本,早期的浏览器不支持 Gzip 压缩,用户就会看到乱码,所以为了支持前期版本加上了这个选项,如果你用了 Nginx 的反向代理并期望也启用 Gzip 压缩的话,由于末端通信是 http/1.0,故请设置为 1.0。
- gzip_comp_level 6 : gzip压缩比,1压缩比最小处理速度最快,9压缩比最大但处理速度最慢(传输快但比较消耗cpu)
- gzip_types :匹配mime类型进行压缩,无论是否指定,”text/html”类型总是会被压缩的。
- gzip_proxied any : Nginx作为反向代理的时候启用,决定开启或者关闭后端服务器返回的结果是否压缩,匹配的前提是后端服务器必须要返回包含”Via”的 header头。
- gzip_vary on : 和http头有关系,会在响应头加个 Vary: Accept-Encoding ,可以让前端的缓存服务器缓存经过gzip压缩的页面,例如,用Squid缓存经过Nginx压缩的数据。。
3. server虚拟主机
http服务上支持若干虚拟主机。每个虚拟主机一个对应的server配置项,配置项里面包含该虚拟主机相关的配置。在提供mail服务的代理时,也可以建立若干server。每个server通过监听地址或端口来区分。
- listen
监听端口,默认80,小于1024的要以root启动。可以为listen *:80、listen 127.0.0.1:80等形式。 - server_name
服务器名,如localhost、http://www.example.com,可以通过正则匹配。
模块http_stream
这个模块通过一个简单的调度算法来实现客户端IP到后端服务器的负载均衡,upstream后接负载均衡器的名字,后端realserver以 host:port options; 方式组织在 {} 中。如果后端被代理的只有一台,也可以直接写在 proxy_pass 。
4. location
http服务中,某些特定的URL对应的一系列配置项。
- root /var/www/html
定义服务器的默认网站根目录位置。如果locationURL匹配的是子目录或文件,root没什么作用,一般放在server指令里面或/下。 - index index.jsp index.html index.htm
定义路径下默认访问的文件名,一般跟着root放 - proxy_pass http:/backend
请求转向backend定义的服务器列表,即反向代理,对应upstream负载均衡器。也可以proxy_pass http://ip:port。 - proxy_redirect off;
proxy_set_header Host $host;
proxy_set_header X-Real-IP $remote_addr;
proxy_set_header X-Forwarded-For $proxy_add_x_forwarded_for;
这四个暂且这样设,如果深究的话,每一个都涉及到很复杂的内容,也将通过另一篇文章来解读。
关于location匹配规则的写法,可以说尤为关键且基础的,参考文章 nginx配置location总结及rewrite规则写法;
5. 其它
5.1 访问控制 allow/deny
Nginx 的访问控制模块默认就会安装,而且写法也非常简单,可以分别有多个allow,deny,允许或禁止某个ip或ip段访问,依次满足任何一个规则就停止往下匹配。如:
location /nginx-status {
  stub_status on;
  access_log off;
#  auth_basic   "NginxStatus";
#  auth_basic_user_file   /usr/local/nginx-1.6/htpasswd;

  allow 192.168.10.100;
  allow 172.29.73.0/24;
  deny all;
}
我们也常用 httpd-devel 工具的 htpasswd 来为访问的路径设置登录密码:
# htpasswd -c htpasswd admin
New passwd:
Re-type new password:
Adding password for user admin

# htpasswd htpasswd admin    //修改admin密码
# htpasswd htpasswd sean    //多添加一个认证用户
这样就生成了默认使用CRYPT加密的密码文件。打开上面nginx-status的两行注释,重启nginx生效。
5.2 列出目录 autoindex
Nginx默认是不允许列出整个目录的。如需此功能,打开nginx.conf文件,在location,server 或 http段中加入autoindex on;,另外两个参数最好也加上去:
- autoindex_exact_size off; 默认为on,显示出文件的确切大小,单位是bytes。改为off后,显示出文件的大概大小,单位是kB或者MB或者GB
- autoindex_localtime on;
默认为off,显示的文件时间为GMT时间。改为on后,显示的文件时间为文件的服务器时间
location /images {
  root   /var/www/nginx-default/images;
  autoindex on;
  autoindex_exact_size off;
  autoindex_localtime on;
  }
本文部分内容来源于 菜鸟教程 及 SegmentFault 。
本文来自:https://zhuanlan.zhihu.com/p/33418520 如有侵权请告知。
 创作不易,留下一份鼓励
按点赞数排序
按时间排序


 点赞 6
点赞 6 浏览 6.4k点赞 1浏览 3.5k点赞 10浏览 5k
 微信公众号
微信公众号 加入微信群
加入微信群

